
It is about that time guys! Gardening season. It is time to think about starting seeds indoors.
 One of my favorite hobbies is to be out in the garden. Now, after watching and helping, my kids would rather dig in dirt than on a swing or slide. This year I am going to make them their own little digging spot in the backyard to protect my seedlings.
For those of you that missed it, a couple of years ago, I guest posted on the Live Like You Are Rich Blog about how to fold your own seed starting pots out of newspaper. This is a great method for starting seeds indoors. The following is a re-published post from my guest post that was found here.
Today I want to talk about gardening! The last few years, we have had very successful gardens and want to share a couple of tips with you. Spring is here and it is time to get your plant on.
Starting Seeds Indoors
Tip 1: How To Make Seed Starter Pots Made From Newspaper
While starting seeds indoors, instead of buying seed starter cups, pellets, or other expensive ways of gardening, lets get back to the basics and try this simple tutorial for making Origami Newspaper Seed Starter Cups. I love these because after you get your seedlings growing, you can plant the whole thing! Here is some instructions and a video to help you. [Video Here] [Pictures Below]
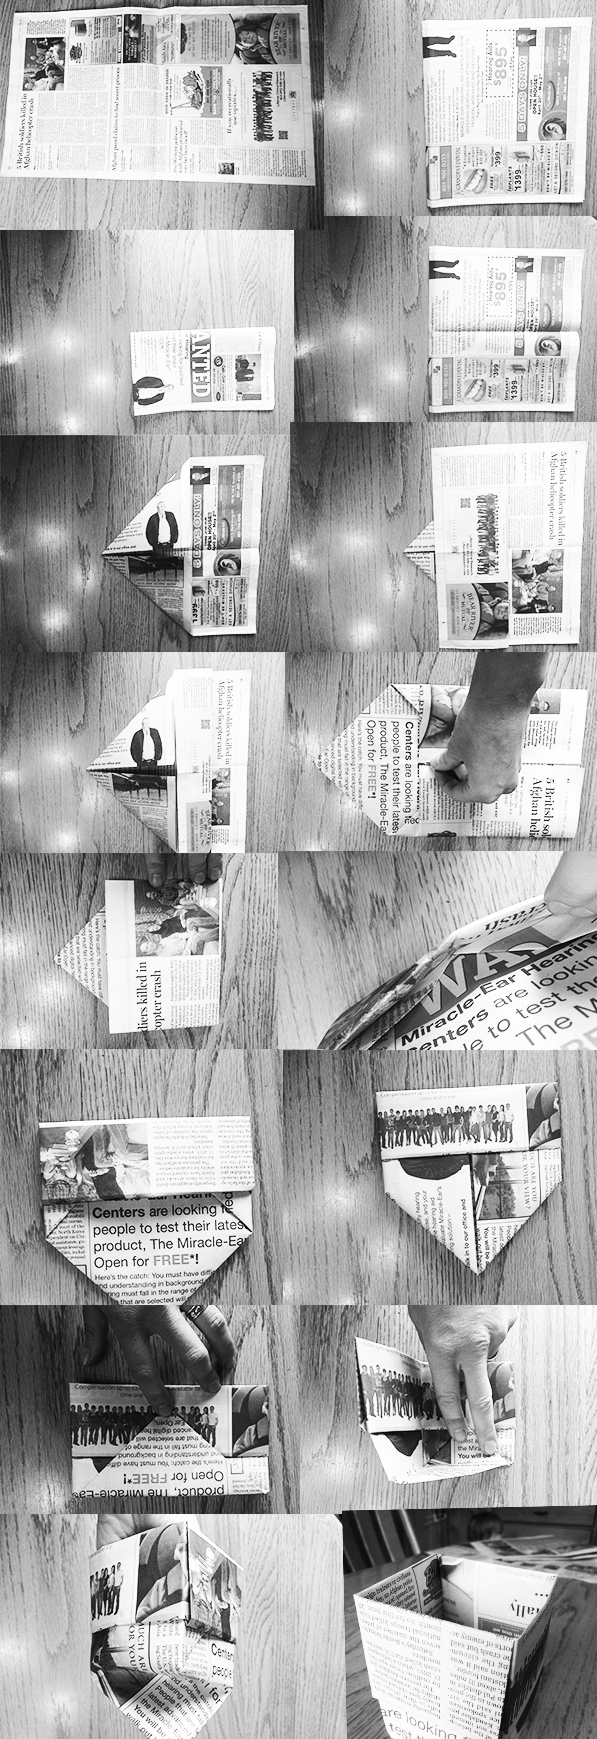
1. First, cut the newspaper along the center fold so that you have only one single side, front and back. Sometimes there are already single sheets in the middle of the paper, if there is, just use that.
2. Next, notice that the lateral fold is not exactly even. Fold your newspaper sheet in half (hamburger style) to make a perfectly even fold.
3. Now, crease it once more the opposite way (hotdog style) and open it back up. ***If you are wondering what I mean by “hamburger and hotdog” style, it just means that when the fold is finished, if the finished fold makes it shorter and fatter, we call it “hamburger style”. And if the fold makes the paper longer and skinnier, it is called “hotdog style”. My first grade teacher used those terms and I am not sure how widely used they are but I have heard them used by people that I did not go to school with, so I think it is a real saying.
4. Now, from the bottom folded edge, take the corner and fold it up to the center crease creating a point. Do this to both sides.
5. Now, take the tops sheet from the top and make a crease on the flat line that the points have made. Fold this flap in half and fold it down onto your crease.
6. Turn the whole thing over.
7. Now, take the wide corners and fold those to the middle.
8. Take the squared edge, and fold it up to the thick halfway line and crease it, again, pull this back up, fold the flap in half and fold it down.
9. Now, tuck the flap into the first set of corner flaps that are inside the envelope section.
10. Once it is tucked in, it may have taken some finagling, turn the project over.
11. Fold down the point as far as its corners go.
12. Take the point and fold it up to either of its other corners to make a crease on the inside fold.
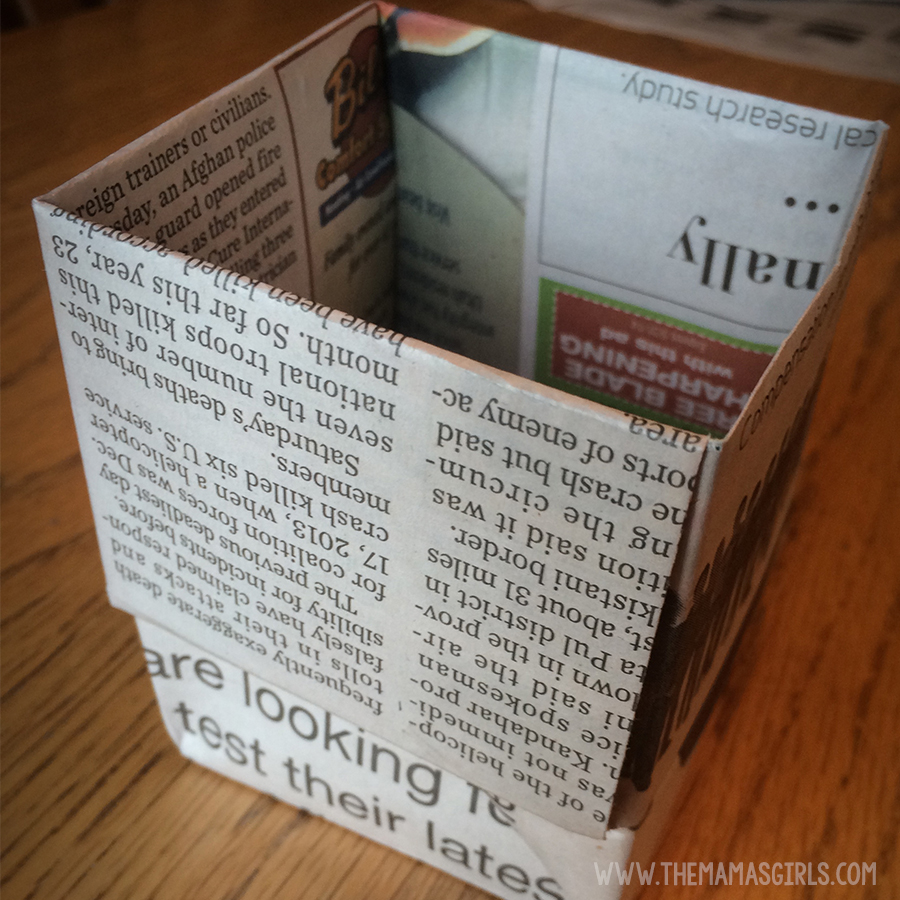
13. Now, reach your hand in through the bottom and expand the paper into a dish shape. Use the most recent crease you made to fold in half and make the bottom of the squared cup. It helped for me to pinch the two corners to make a flap, then fold it down.
14. I used a tap of non-toxic glue stick to make the bottom stay shut. Now, repeat for as many cups as you need. I promise, it goes really fast once you have made one or two.
Tip 2: Use an Automatic Fertilizer
Before filling the cups with soil to plan your seeds, add a fertilizing “tea bag” at the bottom. This makes it a self fertilizing plant!
Tip 3: Plant the Entire Plant
After your indoor seedlings grow and are ready to be moved outside, this may be most important tip, make sure to pinch off all of the “branches” or leaves besides the very top ones. Then, bury the plant almost to the tips. This will create a simulated strong root from the get go, and where the “branches” were, it is like nutrient sponges. When we have done this to our tomato plant starts that were about a foot tall before getting moved outside, they grow almost as tall as my 6 foot husband.
I am excited for you all to try making these cups and starting your seeds indoors. This is something very fun to get your kids involved with. Give it a shot!
