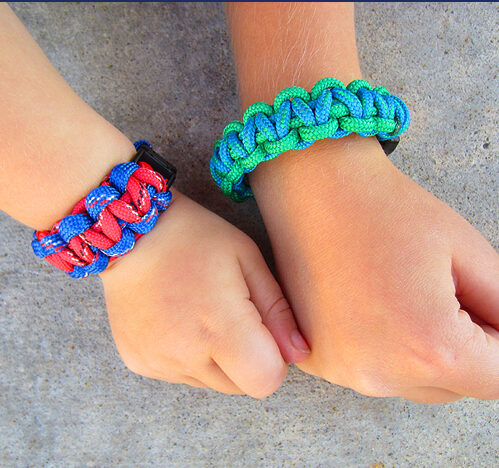
My kids are total craft junkies. We are non-stop markers, stickers, paint, pipe cleaner, you name it, my kids will craft it. They always look forward to going to my mom’s house because she usually has some fun and creative activity planned for them to do when we visit. She calls it “Crafternoon”. The other day we had a little “Crafternoon” of our own.
Last year these paracord bracelets were all the rage in our neighborhood. My oldest made a handful while we were on vacation. He gave them away to friends and family and then sort of forgot about them. A recent scout activity brought them back with a vengence at our house. We turned into a paracord bracelet factory overnight! It is a great activity for kids eight years and older. If they are any younger than that, be prepared to “help” (do the whole thing for) them 🙂 They’ll feel equally as cool wearing it even if their mom “helped”.
What you’ll need:
Paracord (can be found at any craft store or on Amazon.com)
Paracord Buckle (3/8″) (can be found at any craft store or on Amazon.com)
Scissors
Lighter
Strong muscles (you’ll understand when you start making these 🙂
Here’s the link to the original video where we learned how to do these bracelets. It is a video from Beadaholique. They did a great job, and I’m all about giving credit where credit is due! Watch this video first and the pictures below will be a good refresher course.
Beadaholique Paracord Bracelet Tutorial
Now that you’ve seen the video, here is a step by step version of how we did my son’s “Spiderman” bracelet. Apparently if you are 3, and you wear a blue and red bracelet, imediately you have the power to shoot a web from your wrist by simply holding up your hand and making the sound “wssst”. And it can go on for days…
Thread the paracord through the clip, like so…
Loop it back through and pull tight.
Get the end of the second color you want to use, and prepare to fuse it to the end of the first color with the lighter.
Fused.
Measure the wrist you are making the bracelet for and make sure two adult fingers can fit between the bracelet and the wrist. That will account for the amount of space the knots will take up when the bracelet is finished. Slide the 2nd clip to that spot and begin the bracelet with a macrame square (cobra) knot.
Continue alternating which side you tie from. The pattern should retain the one color for the outside and the other for the middle. If this is not the case, check the knot to make sure you alternate sides.
When you reach the other clip. Pull tightly to secure your stitches.
Cut the excess off to leave about this much paracord.
Burn the cut ends and smooth them out with the side of the lighter.
And “wssst”! You now can shoot spiderwebs out of your bracelet…or bracelets, because who could only have one Spiderman bracelet?


wow that’s very creative! i love it
Thanks! Once you get the hang of it, they go really fast! Thanks for stopping by!
Awesome share! I try to build that too now, so inspiring.
Keep up the good work and maybe pay me a visit:
http://www.idbraceletsforkids.com/
wow.. thank you. that looks like something we can do. We bought a kit and the directions were not clear and we couldn’t figure out how to finish it. So thank you so much your directions will help. Janet
hi its a nice idea i like it
Love the idea of using more than one color! Thanks for the tutorial!
So glad you liked it. Please let us know how it goes!
Pingback: Camp Crafts for Kids - Metro Parent