The first time I made a quilt, and I mean a REAL quilt, I wasn’t quite sure how to sew on the binding. I spent a lot of time and effort making a quilt for my mom’s 80th birthday, and I didn’t want to mess it up by doing a poor job on the binding.
Fortunately, I have a co-worker friend who is an avid quilter. She knows it all. So, on my lunch hour, I went to her office and asked her to explain how to do it. She took a napkin and cut a strip. She began explaining it to me while using paper napkins for a visual aid! It made total sense! It was waaaay easier than I thought it was going to be.
Because I am a visual learner, the explanation using the napkin was perfect. I came home and added the binding to my mom’s 80th birthday quilt just like she taught me! (BTW, it was a great birthday surprise! She had no idea that I knew how to make a quilt! The truth is, neither did I!)
This step-by-step tutorial has a lot of steps and pictures, but take a minute to look through all of the steps. I think it helps to get in your mind how to do it before you begin.
I like to use a Rotary Cutter, Self-Healing Cutting Mat and Quilter’s Ruler.
These were well worth the small investment!
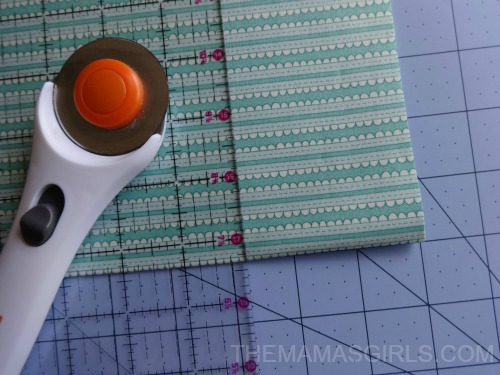
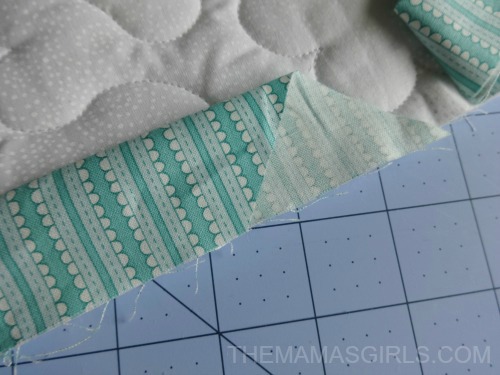
Cut strips to desired width. I like a small binding, so I usually use a 2 1/2″ or 2 3/4″ wide strip. When I am using a striped fabric, I like cut it across the grain so that the stripe is perpendicular to the edge. You could also cut the strips on the bias (at a 45° angle) if you want diagonal stripes on the binding. The directions for sewing the binding onto the quilt are still the same. Be aware that when the strips are cut on the bias, they will stretch a bit.
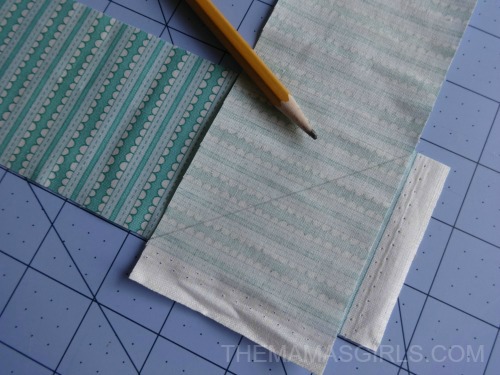
After you have the strips cut, (make sure you have enough to go all the way around the 4 sides of the quilt, plus about 12 more inches.) Use a ruler and draw a light pencil line from corner to corner. (This is how you will stitch the strips together.)
Stitch on the pencil line.
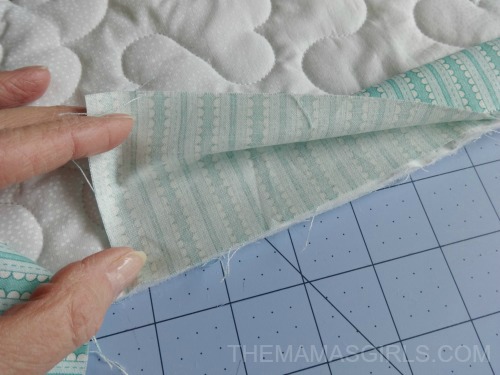
Use your ruler to trim the seam to 1/4″.
Press the seams open.
Here is how it will look when pressed.
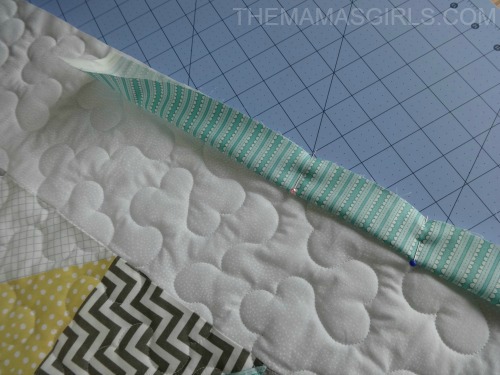
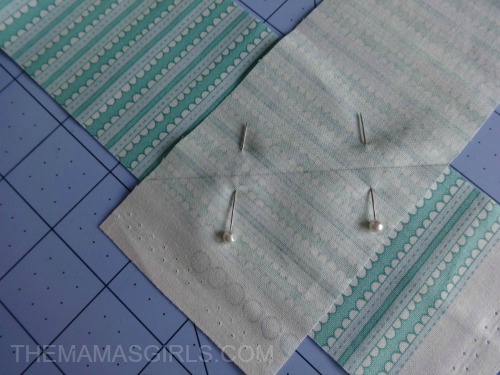
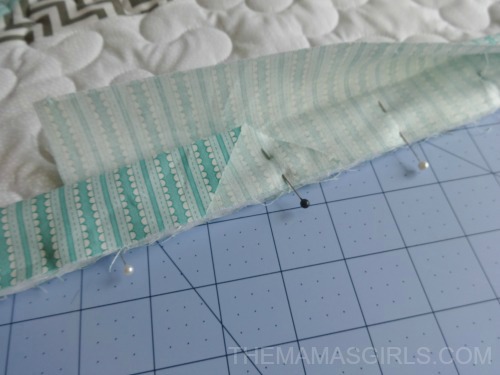
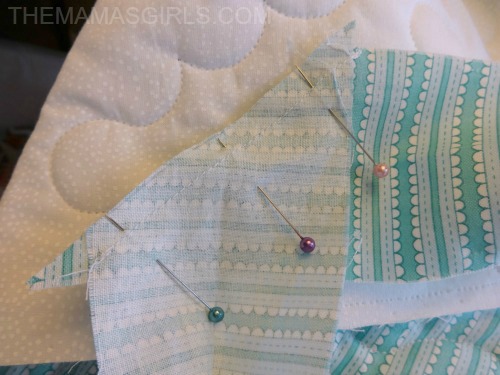
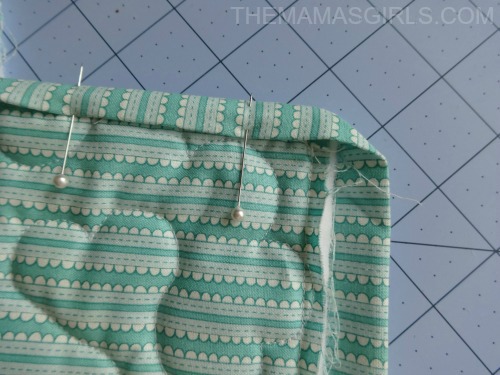
Fold the strip in half (but do not press) and pin it to the front edge of the quilt as shown above. (Leave about 8″ unpinned and start the stitching about 8″ from the end – you will stitch the ends together later when the strips meet.)
Stitch using 1/4″ seam allowance – STOP 1/4″ from the end as shown above.
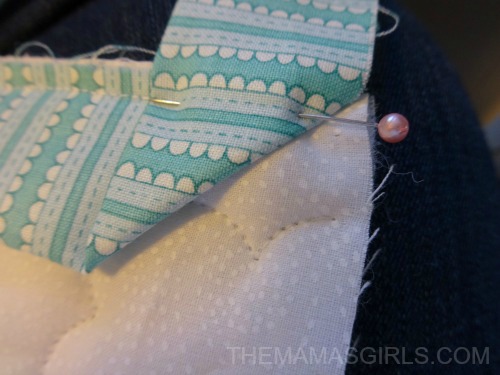
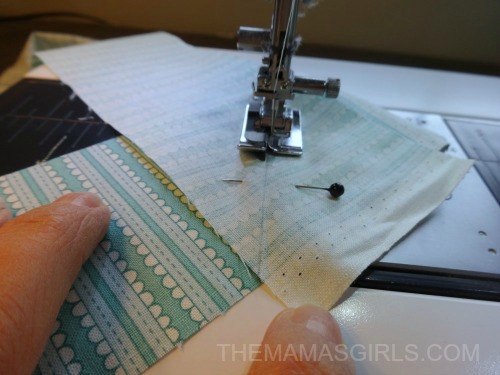
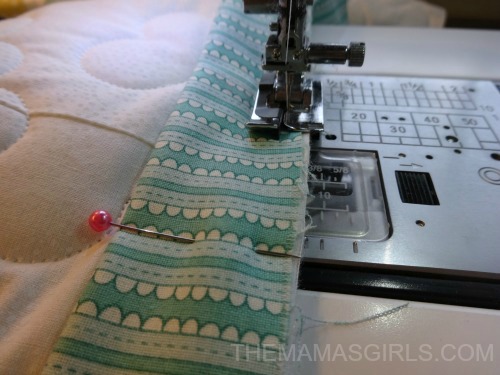
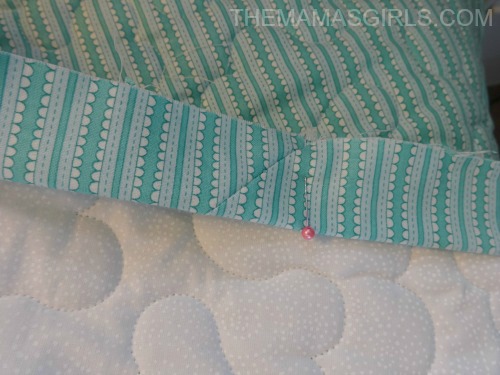
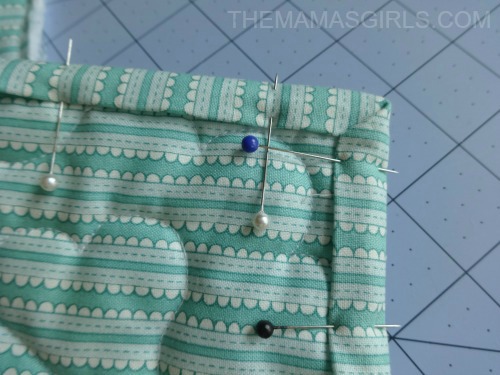
Fold the strip up as shown and pin to secure. The pin will be right in line with the 1/4″ seam allowance.
Then fold the strip back down and stitch (using 1/4″ seam allowance.) The edge on the right should line up with the edge of the quilt.
Do the other three corners the same. When you get about 10″ from the end of the end of the beginning strip, stop stitching. (You need these to be unattached so that you can stitch them together.)
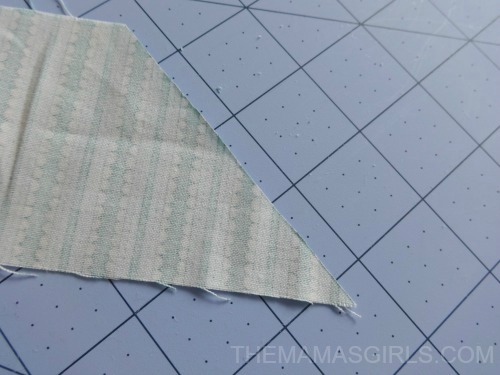
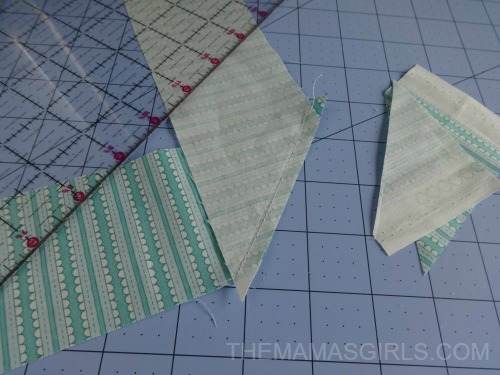
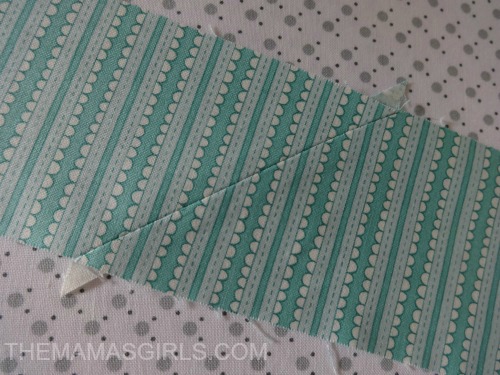
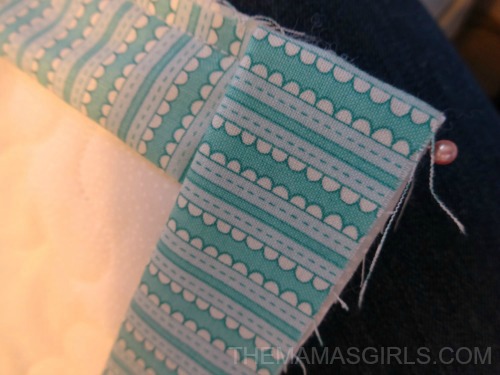
Lay the quilt out in front of you, right side up and unfold the strip on the left. Use a ruler to mark and cut a 45° angle as shown above.
Fold the strip in half again and lay it next to the edge as shown.
Now, unfold the strip on the right…
then lay the folded left strip on top of the right (unfolded) strip.
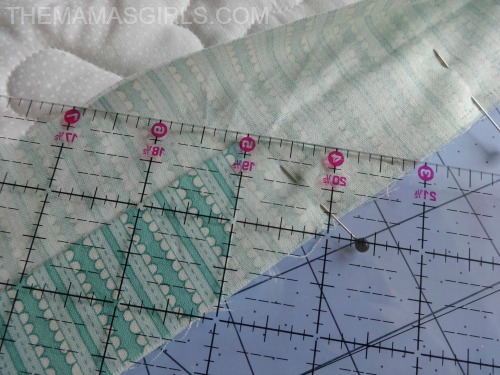
Use your ruler to draw a light pencil line to match the 45° angle on the left strip. (You can see the left strip underneath.)
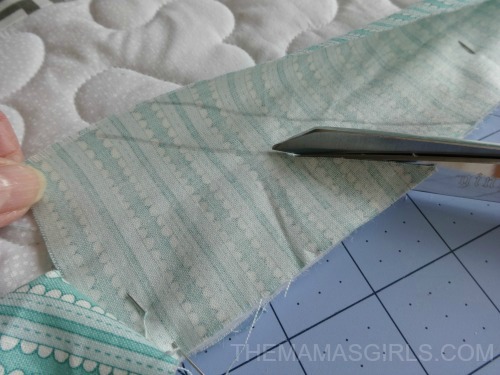
BEFORE you cut the strip, ADD 1/2″ (this will give you enough for two 1/4″ seam allowances so it will match up perfectly!)
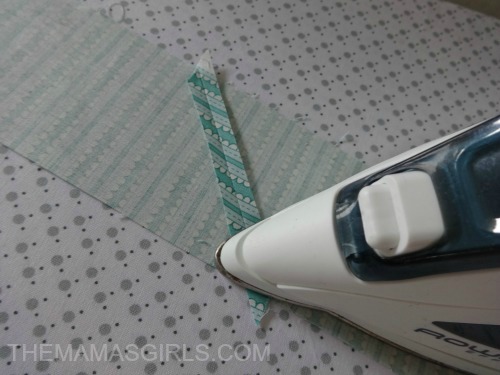
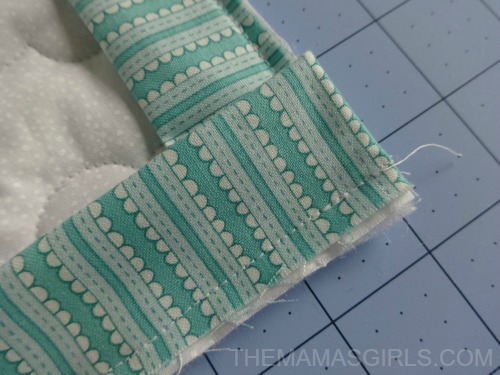
Pin the strips together and stitch as shown. Open the seam and press it open using your fingers.
Then fold the strip in half again and pin it the the front of the quilt. It should fit perfectly! Stitch it in place.
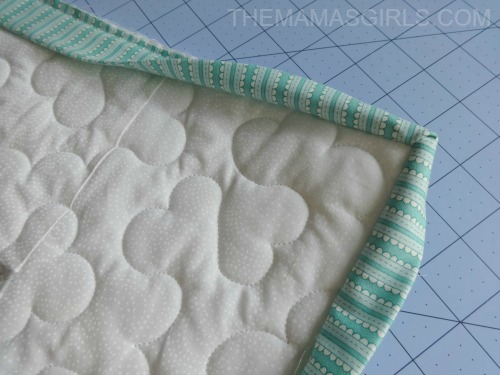
After you have sewn the strip all the way around, fold the strip back as shown. You will see a nice mitered corner.
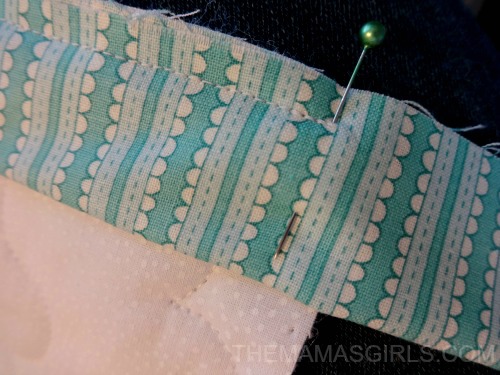
Turn the quilt to the back and fold the top edge over and pin.
Then fold the side over to meet the top edge and pin. See? You have a perfectly mitered corner!
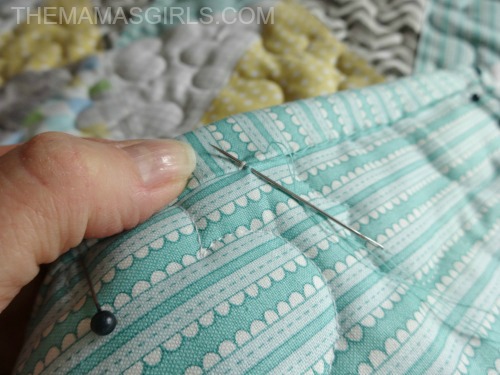
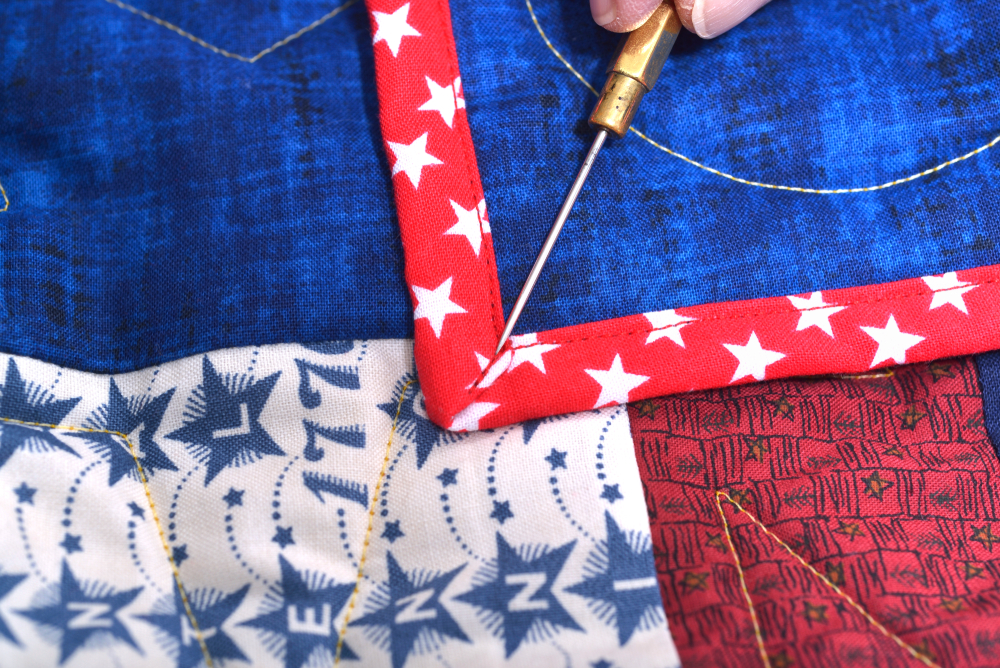
I like to hand stitch mine using a blind stitch or whip stitch- but if you prefer, you can do it by machine. You just need to “stitch in the ditch” on the top side making sure that it gets stitched through the binding on the back.
Here are some of the tools I used:

Becky,
You did a wonderful job of creating an easy to follow example. This is how I create my bindings except for the ending, which I will try, and your instructions not to press the binding material prior to attaching it. Your beautifully bound quilt is lovely. Job well done!
Thanks for sharing.
Denise
Becky, thank you so much for your excellent tutorial! Your explanations are easy to understand and, as a visual learner, the pictures are clear and show exactly what’s needed, so these are a great help to me.
This is the method and explanation of how to end your binding with a bias seam. I love it! Thanks
This looks way easier than the way I connect my ends. Can’t wait to try your method. Also I was always taught to press it when I fold it in half lengthwise. What are your reasons for not pressing it?
THANK YOU! Love the pictures and explanation.
Thanks so much for the great tutorial. I’ve bookmarked this for later. I’ve only made a few small baby quilts but want to attempt a large one. Wish me luck.
That last bit about cutting at 45 Degrees was new to me. Will try it next time as it sounds easier than what I am doing now. Why do you say do not iron the folded binding? Any particular reasons?
Really great tutorial! Thanks for putting it together!
I am a self-taught quilter but this was an awsome tutorial and my quilts will be better bound from now on. Not to mention myNV sanity. Thanks!
could not figure this out at the end no matter what I did. I ended up with wrong angles. It looks like a good way to do but but did not work for me.
Hi Becky, thank you for the fab tutorial. Your friend must have explained it very well to you because you have explained it beautifully too. Your way looks to be far easier than the method I use.
OMG I can finally figure out, (from your excellent instructions and pictures), how to join the 2 ends together once I have stitched the binding onto the quilt!!! Thank you so much, now I will be able to finish my quilts without pulling my hair out!!!!
Being one who has
struggled with bindings, this made bindings seem easy to do.
Thank you for the exceptional tutorial. The photos made it much easier for me
Thank you so much for the very clear and detailed directions! Your method will look better compared to the last tutorial I used on a couple of grandsons’ quilts.
Awesome job of explaining and great photos to help understand the process. This is what I’ve been looking for! THANK YOU!!!