
This is a fun technique to make mitered corners for a Flannel Baby Blanket. Once you learn how to make these Baby Blankets, you will be unstoppable! Every baby within 10 miles of you will probably have one! And you’ll find that shopping for coordinating cute flannel prints can be addicting!
Just an FYI, when I’m learning a new sewing technique, I find that it helps to go through all of the instructions first to get in my mind how it should come together. Take a minute to review these instructions before beginning.
You will need:
1 yard flannel (top)
1 1/4 yard flannel (for the back and the border)
matching thread
Wash and dry the flannel to pre-shrink it before cutting.
Cut 2 squares of flannel. The larger square will be the back of the blanket and the mitered border. Cut it to measure 41″ x 41″. The smaller square (the top) should measure 31″ x 31″. This will leave a 5″ border on all sides. Try to be precise in your measuring and cutting. Your corners will turn out better!
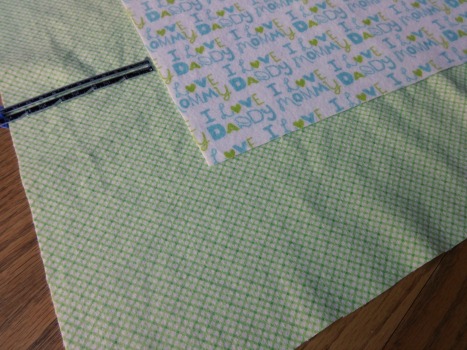
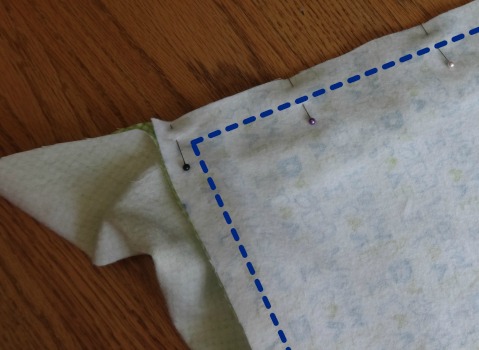
Find the center of each side and mark it on all four sides on both top and bottom pieces. (I just fold it in half and mark the center with a pin.) Make sure the grain of the fabric runs the same direction on both top and bottom pieces. With right sides together, place the small square on top of the large square, (match up centered markings) and pin. (Remember that the smaller square will not reach to the other side (it will seem like it is 10″ too short!) This is how it should be!
Go ahead and pin it to both sides anyway. See the photo below.

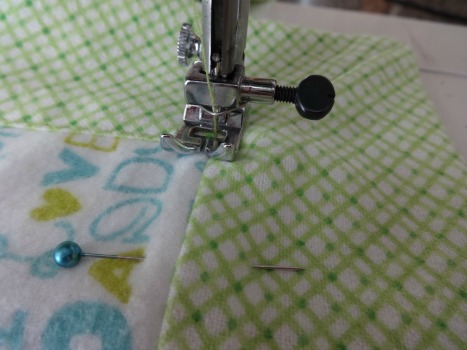
When you begin to stitch the seams, start 1/2″ in from the edge. (Use 1/2″ inch seam allowances for the entire project.)
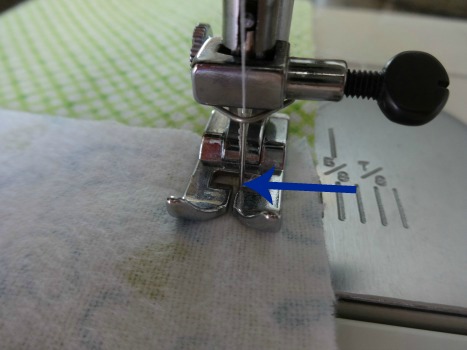
End the stitching 1/2″ from the end also.
You will have 1/2″ inch that is not attached on both ends. These are the “flaps.”
Now stitch the opposite side the same way (make sure they are centered before pinning.) Be sure to leave about an 8 – 10″ opening on one of the sides. This is so that you can turn it right side out later.
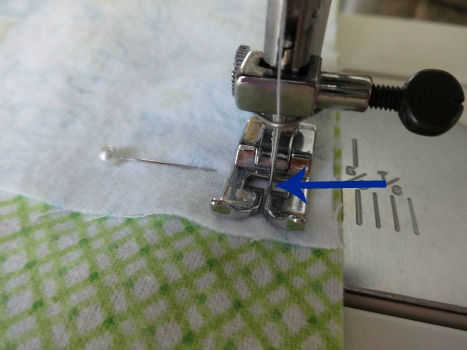
Now pin the opposite sides the same way. Start the stitching at the 1/2″ flap (blue arrow) and stitch to the other end.

Repeat on the opposite side.
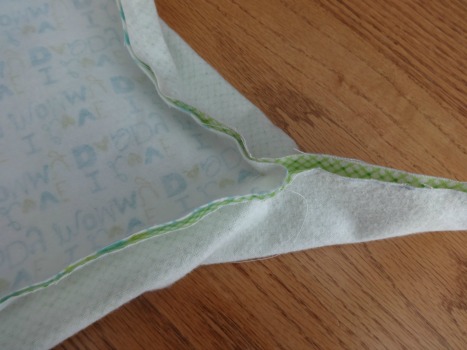
This is how it should look after it is all stitched. All four sides are now complete and the stitching at the corners should meet. See photo below:
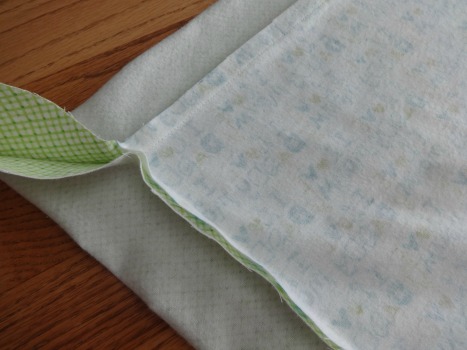
Fold it as shown in the photos below.
Fold it as shown and use your hands to smooth it out like this.

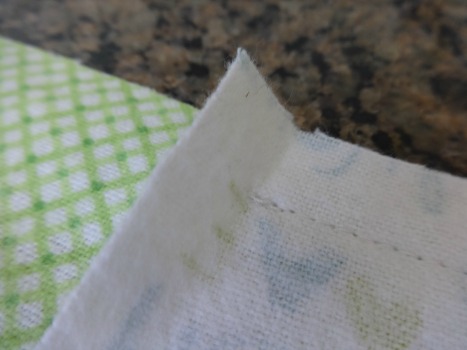
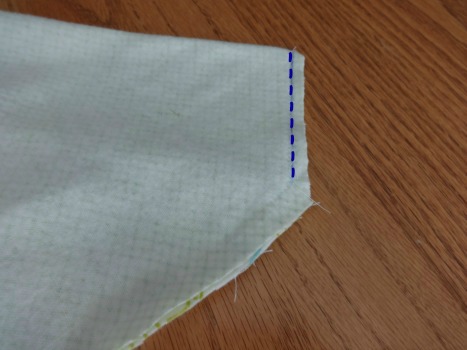
Mark a 45° angle.
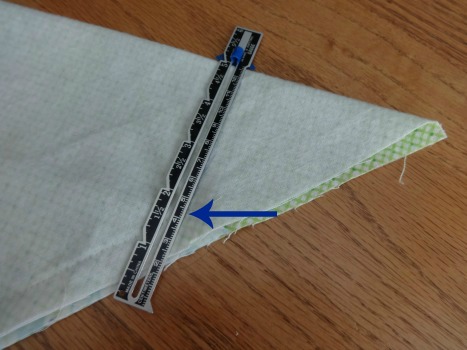
Stitch along this line and stop at the arrow (where the other stitching ended.)

and trim it to 1/4″.
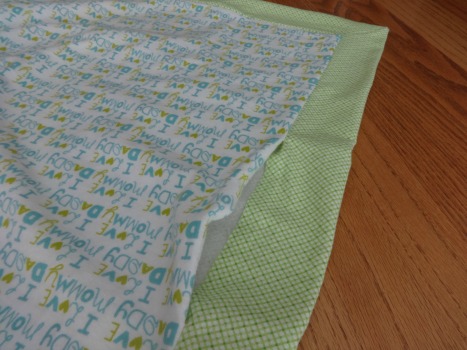
Using the opening that you left un-stitched, turn the blanket right-side-out. Make sure all of the corners are nice and pointed.
Pin it all the way around the blanket as shown.
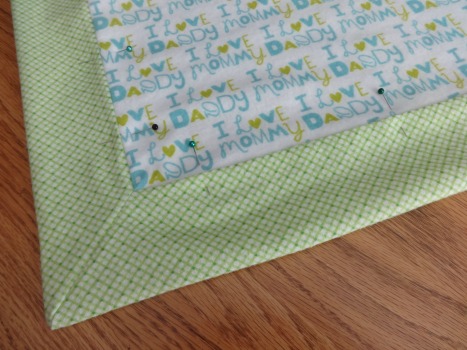
Now topstitch with a zig-zag where the top fabric and the border meet using matching thread. (The zig-zag stitching will also close the opening that you left open to turn it right side out.)
Press with a hot iron to remove any wrinkles. It’s done!
Now that you’ve got the hang of it, make another!

I love making these little blankets. I want to make some and when a baby shower comes up I am prepared.
I tried this, I couldn’t get it to lay flat. Took it apart cut it down now I am going to try it again. Maybe I cut the corners wrong. Will let you know it I get right this time. I don’t have a problem with making cloths for my grandchildren BUT crafts to me is a whole different game.
My guess is that you may have the grains of the fabrics laying in opposite directions. If they are opposite, one will slightly “stretch” and the other won’t stretch as you sew it.
Thank you for posting these fantastic instructions! Your directions were so easy to follow, and your photos illustrated each step so clearly. I made my blanket with a flannel fabric panel on the front, and used a fleece fabric for the back and the border, and am thrilled with how it turned out. Thanks again!
I’m having difficulty following these instructions. Is the a video?
Will this also work for a rectangle? I think if I make the 10 inch difference it MIGHT work?
nice blog post! I love to make a new pattern on my blankets especially the little baby blankets. you made it lovely. thank you for this amazing blog post.
I love this pattern! the mitred corners turned out really well, makes a great gift, Thank you for sharing.
I agree…..the 2nd picture of laying smaller piece on top is NOT helpful as photo is cut off. As we lining up two selvage sides?
Why does the photo show a folded over edge on left side??
Pingback: NICU Blankets – Fort Collins Modern Quilt Guild
Pingback: 34 DIY Baby Blankets